16 Smart Ideas for Wooden Shelf Brackets That Work
Introduction
These ideas range from heavy duty structural supports to decorative accents. Some you can build in an afternoon with basic tools.
Others you can find at the hardware store or online. Pick the ones that fit your skill level and the weight you need to hold.
Idea 1: The Corbel Versus the Cleat
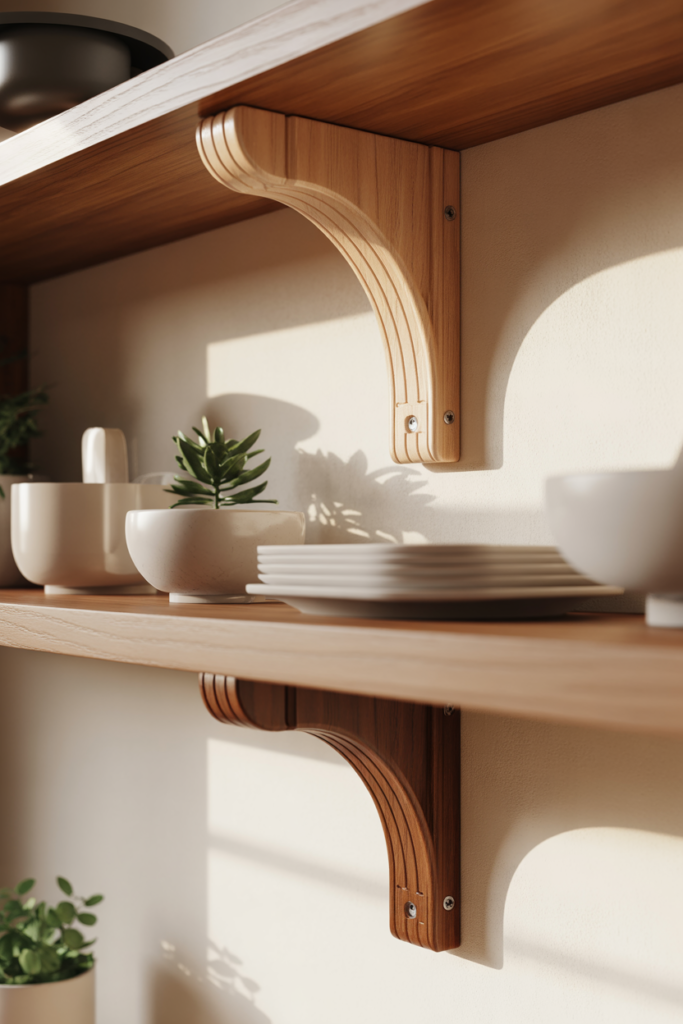
Before you pick a bracket shape you need to know the difference between a corbel and a cleat. A corbel is the pretty decorative piece you see on the underside of the shelf.
It does some of the supporting but it is mostly for looks. A cleat is a hidden strip of wood mounted to the wall that the shelf slides onto.
The cleat does the real heavy lifting. Use a cleat for strength and add a corbel for style.
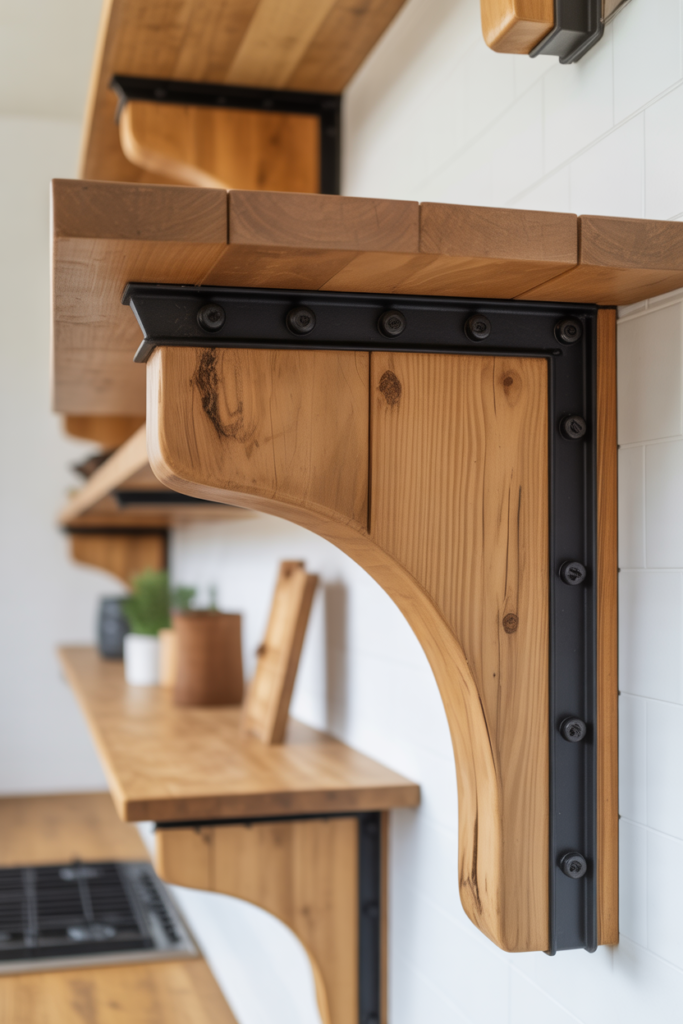
Idea 2: The Hidden Steel and Wood Sleeve
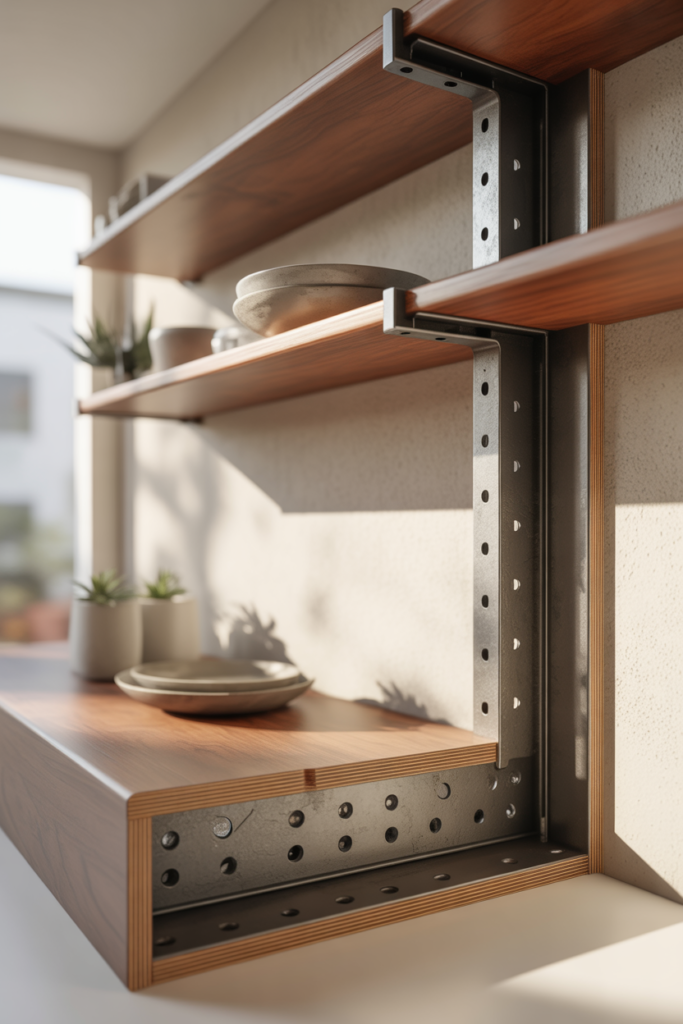
You can buy a cheap heavy duty steel bracket from the hardware store. It holds weight but it is ugly. Build a small wooden box or sleeve that slides over the metal arm.
Use thin wood like quarter inch plywood and glue it together. Now you have a bracket that looks like solid wood but has the strength of steel inside.
Paint or stain the sleeve to match your shelf.
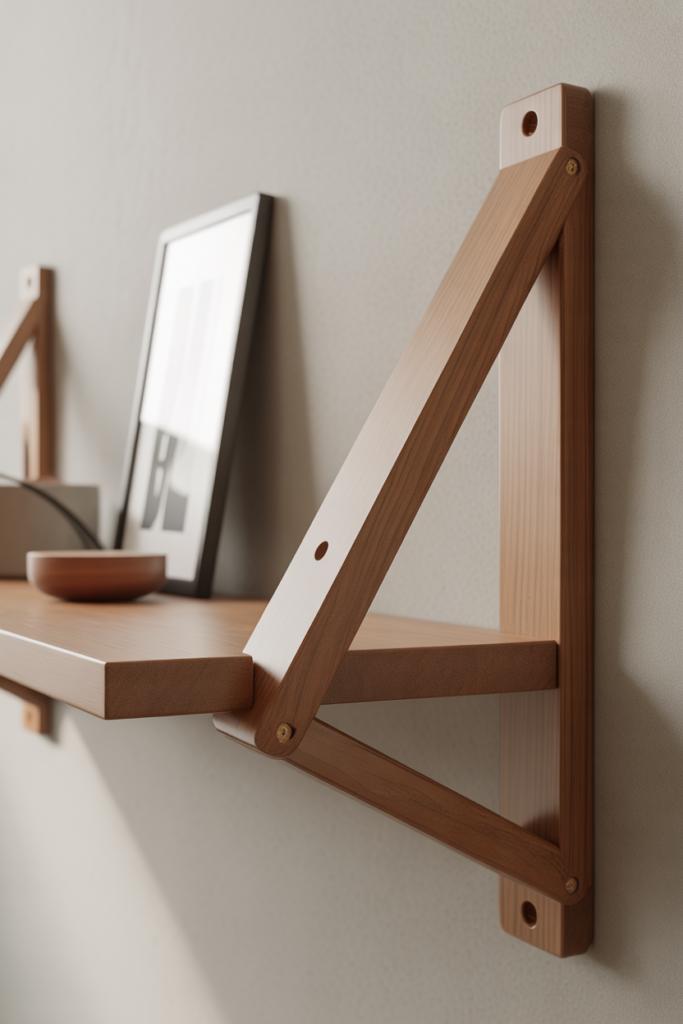
Idea 3: The Triangular Gusset for Maximum Load
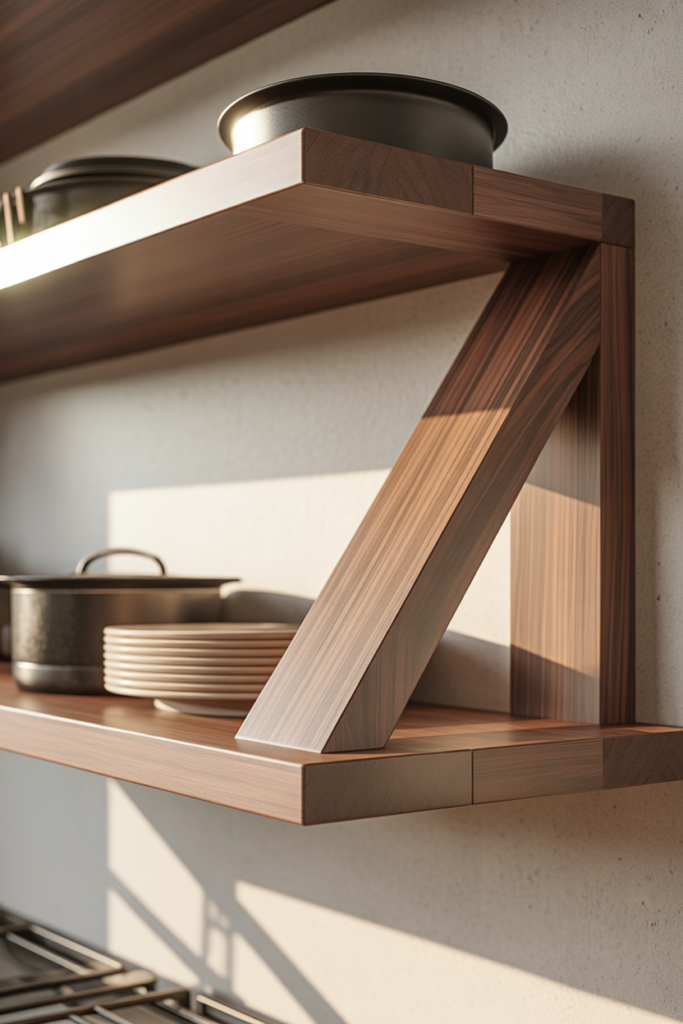
The strongest shape for a bracket is a right triangle. The 45 degree angle transfers weight down into the wall stud instead of pulling outward.
If you are building your own bracket cut it from a solid piece of two by six lumber. Make sure the grain runs diagonally from the wall point to the shelf point.
This prevents the wood from snapping along a straight grain line under heavy weight.
Idea 4: Pick the Right Wood Species

Not all wood holds the same amount of weight. Pine is cheap and easy to cut but it is soft.
A pine bracket might snap if you put too many heavy books on it. White oak costs about three times as much as pine but it holds three times the weight for the same thickness.
If you are building shelves for the kitchen with heavy dishes spend the extra money on oak or maple. Your shelf will stay up.
Idea 5: The Simple Triangle Cut From a Two by Six
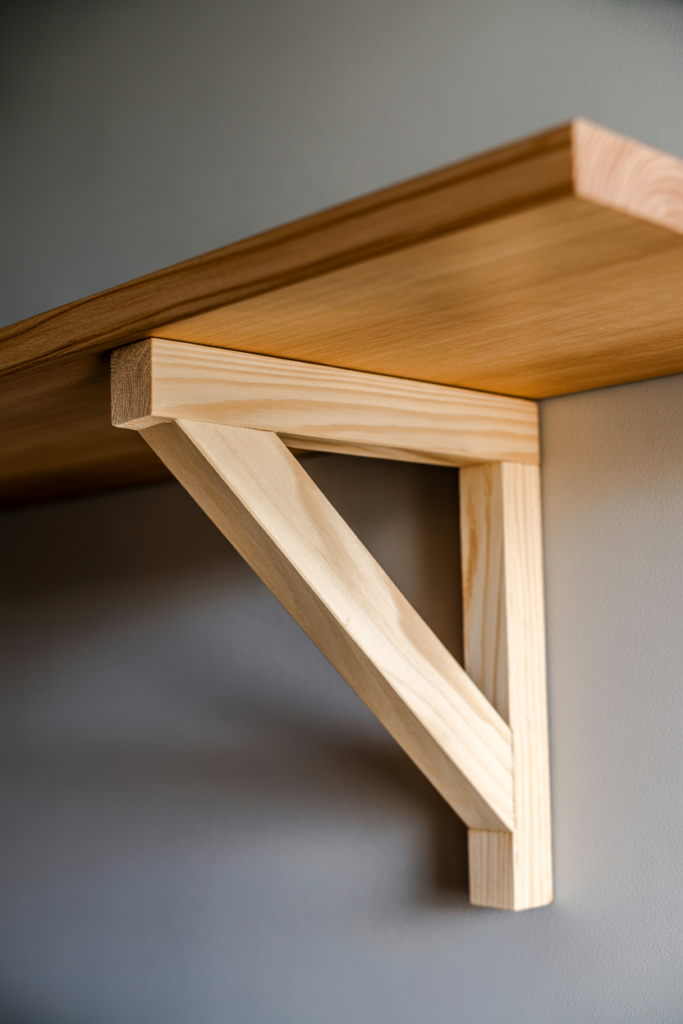
This is the easiest DIY bracket you can make. Take a scrap piece of two by six lumber.
Mark a right angle cut that leaves about eight inches along the wall side and eight inches under the shelf side. Cut it with a miter saw or even a hand saw.
Sand the edges smooth. You now have a solid wood bracket that cost you almost nothing. Paint it or leave it raw.
Idea 6: The Dowel Rod Brace
A thick wooden dowel rod can act as a unique angled brace. Cut the dowel at a 45 degree angle on both ends. One end sits flat against the wall.
The other end sits flat under the shelf. Drill a small pocket hole in each end to screw it into place. This gives a mid century modern look with minimal effort.
Use a dowel at least one inch thick for any real weight.
Idea 7: The Japanese Joinery Look With Half Lap Joints
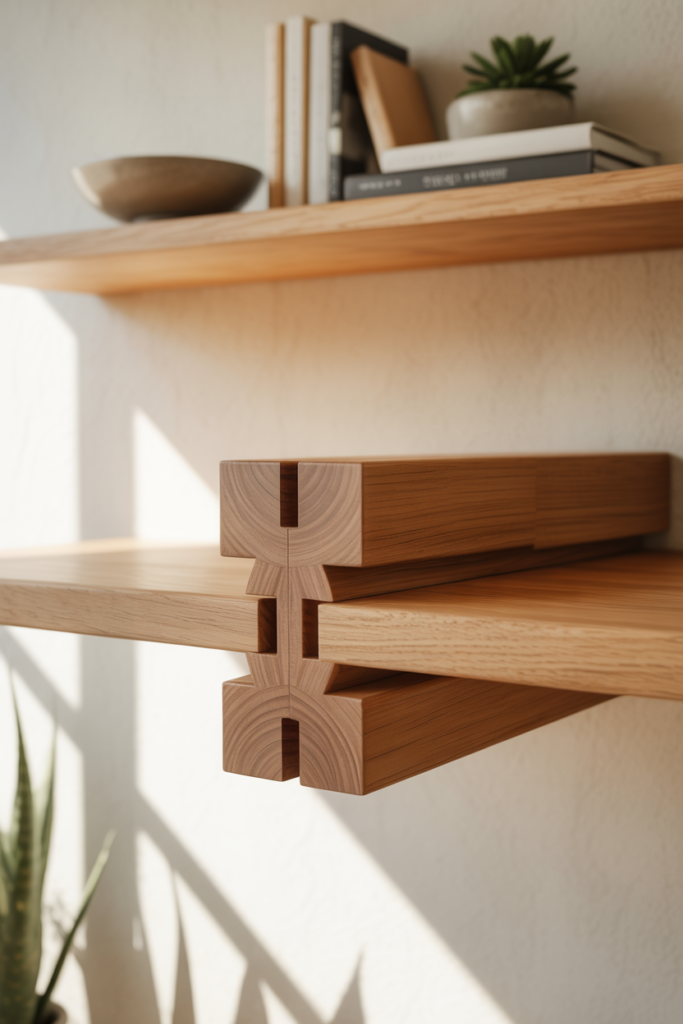
This one looks fancy but the cut is simple. Take two pieces of wood about an inch thick.
Cut a notch halfway through the middle of each piece. The notches should be the same width as the thickness of the wood.
Slide the two pieces together so they lock at a 90 degree angle. No nails needed in the joint just wood glue. It creates a clean modern bracket that looks like expensive furniture joinery.
Idea 8: The Turned Spindle Corbel From a Deck Baluster
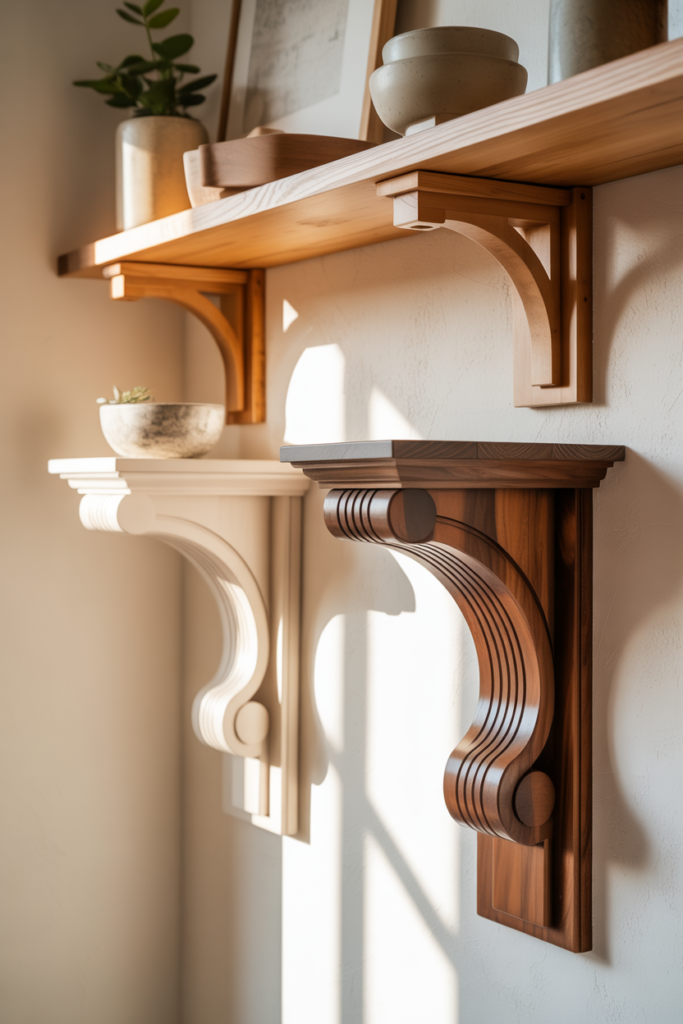
Go to the lumber section and grab a plain wooden deck baluster. These are the vertical posts used on porch railings.
They already have a nice turned shape. Cut one baluster in half diagonally. You now have two matching corbels with a classic curved profile.
Sand the cut edge and paint it white for a grandmillennial look or stain it dark for a traditional feel.
Idea 9: The Scorch and Oil Finish Trick
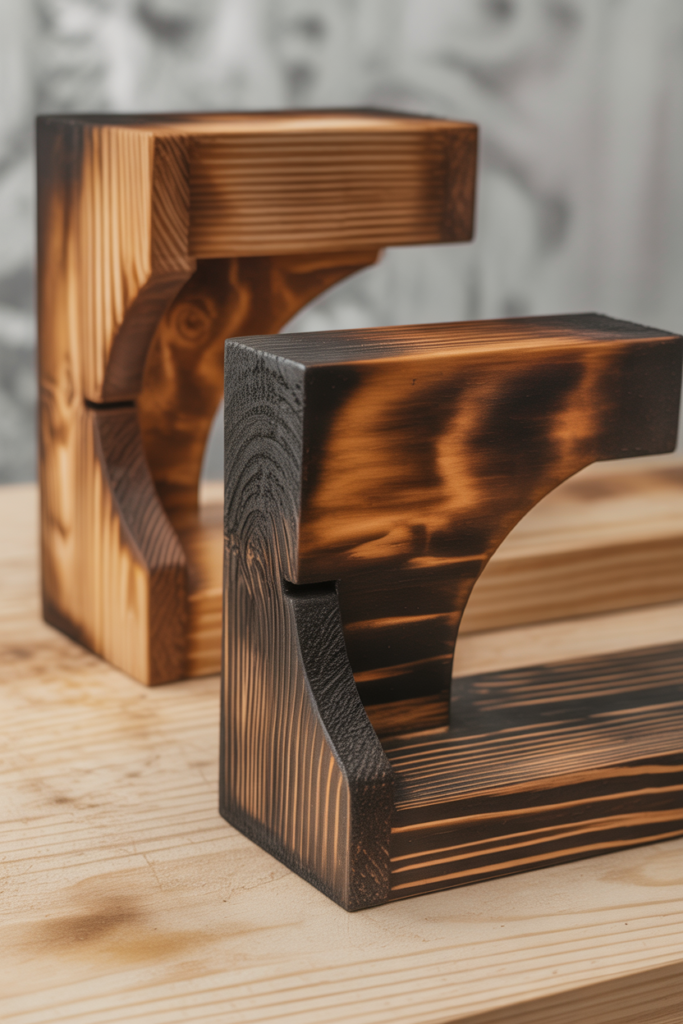
You do not need messy stain to get a dark rustic look. Use a propane torch outside and lightly hit the surface of the wood bracket.
The flame raises the grain and turns the wood a deep chocolate brown. Stop before it turns black.
Once it cools rub it down with Danish oil or paste wax. The bracket looks like it has been aging for a hundred years. This works especially well on pine or fir.
Idea 10: The Invisible Floating Bracket
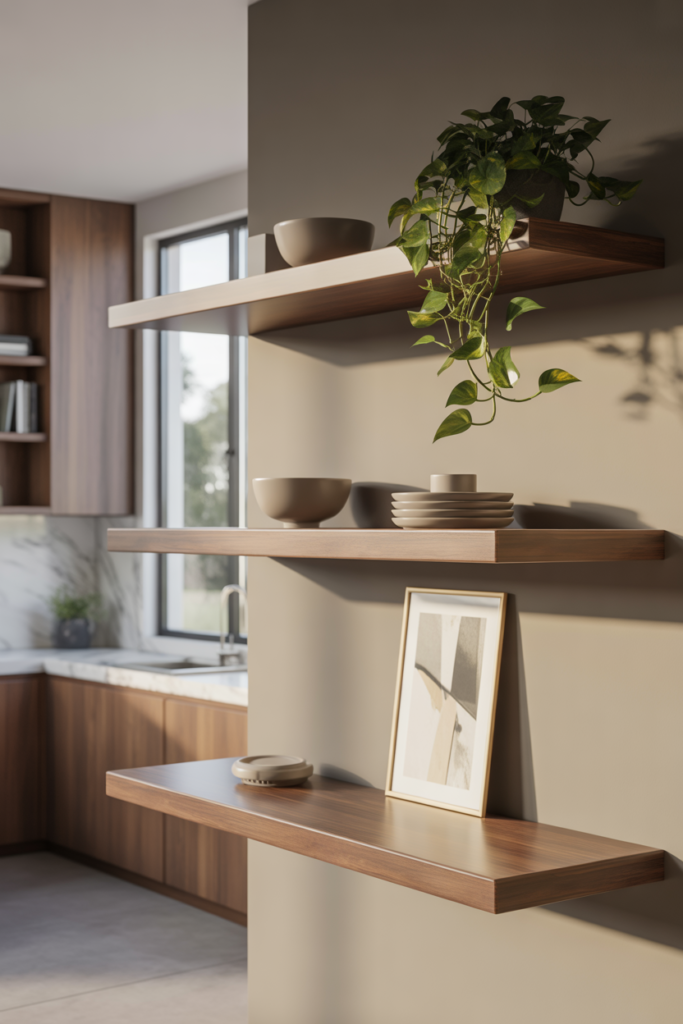
This is the holy grail of shelf brackets. You do not see any hardware at all. To do this you build a hollow shelf box with an open back.
You mount a solid wood cleat to the wall screwed directly into the studs. The hollow shelf slides right over the cleat. The shelf looks like it is floating on the wall. You need a way to cut a hollow channel in the shelf board.
A router works best but you can also build the shelf from separate top and bottom pieces with a spacer between them.
Idea 11: The One Inch Steel Rod With Wood Cap
Combine the strength of metal with the warmth of wood. Buy a set of floating shelf rods online. These are thick steel rods that screw directly into wall studs.
Slide a wooden sleeve over the rod or just cap the visible end with a small wooden disc. You see mostly wood but the steel inside holds serious weight.
This is a great option for renters who cannot cut into walls too much but still want a clean look.
Idea 12: Monochrome Matching to Hide the Bracket
Sometimes the best bracket is one you cannot see. Instead of hiding it inside the shelf just paint it the exact same color as the wall behind it.
Use the same paint and the same finish. If the wall is flat white the bracket is flat white. The eye skips right over it.
The shelf appears to float even with a visible bracket underneath. This is the quickest five minute fix for ugly hardware.
Idea 13: The Single Vertical Support Below the Center
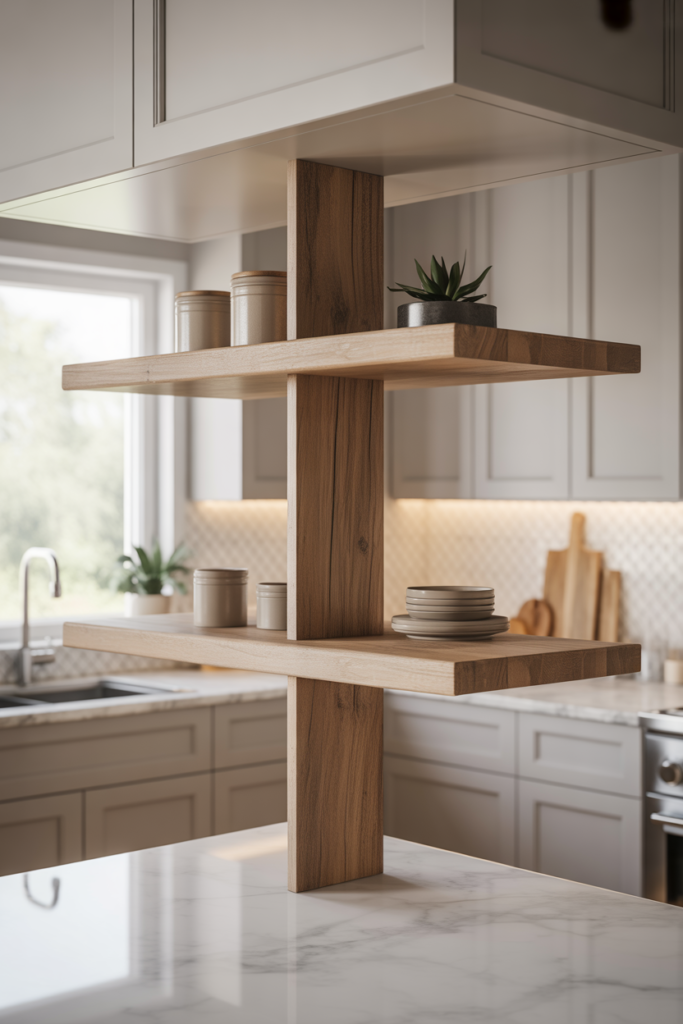
You do not always need two brackets on the ends. For a narrow shelf try one thick piece of wood placed vertically directly under the center of the shelf.
It acts like a table leg. This leaves the sides open and clean. It works best for shelves under three feet long.
Make sure the vertical support is screwed into a stud at the bottom and attached firmly to the shelf at the top.
Idea 14: Farmhouse Style Raw Edge With Iron Strap
This style is still popular for kitchens and mudrooms. Use a rough cut pine bracket that still has some live edge bark on the outer curve.
Add a decorative black iron strap across the front of the bracket. You can buy these iron straps at craft stores or hardware specialty shops. Screw them in with black lag bolts.
The contrast between the raw wood and the dark iron looks intentional and sturdy.
Idea 15: Mid Century Modern Tapered Angle
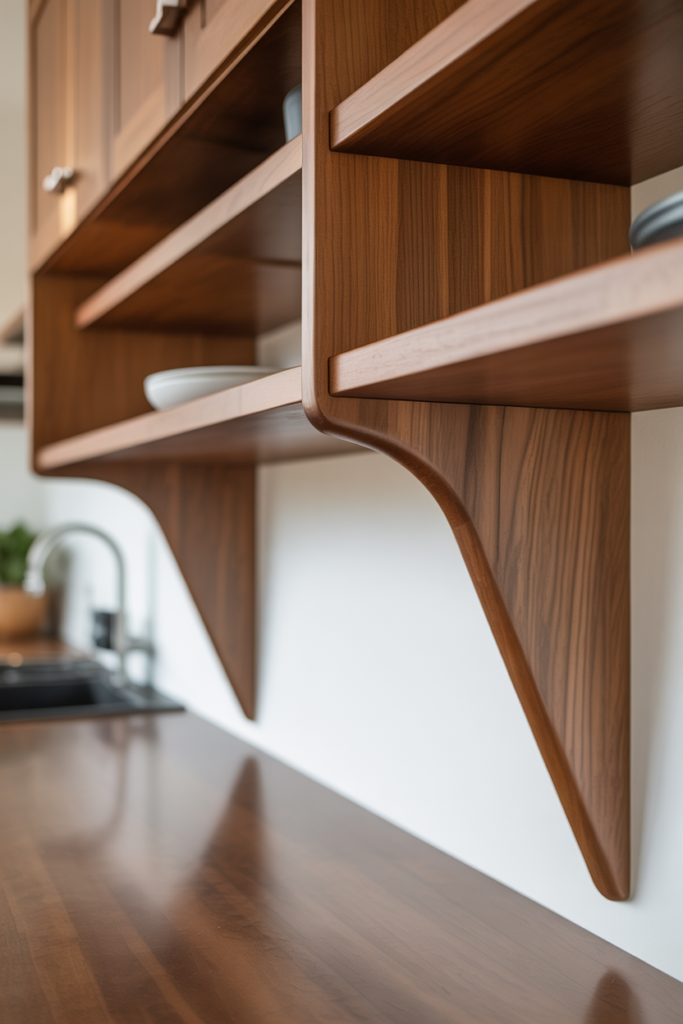
Think of the angled legs on a 1950s credenza. Cut your bracket so the front edge angles sharply inward from the shelf down to the wall.
The bracket gets thinner as it goes down. It should not be a perfect triangle. It should look like a furniture leg.
Use walnut wood for the authentic look. Sand it smooth and finish with clear oil. No paint needed.
Idea 16: Grand millennial Intricate MDF Corbels
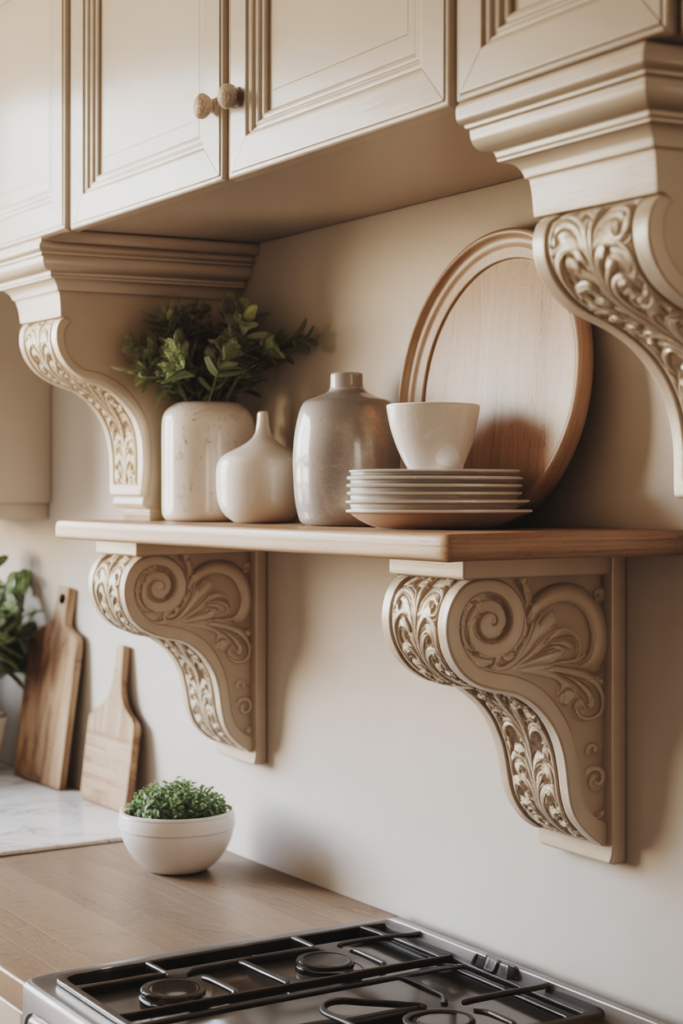
If cutting wood is not your skill set buy primed MDF corbels from a home improvement store. These are lightweight and come in fancy shapes with curves and scrolls.
They are ready to paint. Paint them the same color as your room trim for a built in look. They are not meant for tons of weight so use them for displaying lightweight decor like picture frames or small plants.
Conclusion
The bracket is not just a piece of hardware you have to hide. It can be the feature that makes the shelf look custom and expensive. Whether you build a simple triangle from scrap wood or hide the support completely inside a hollow shelf the choice changes the whole room.
We covered sixteen ideas for wooden shelf brackets. Some are strong enough for cast iron pans. Others are just for pretty displays. You learned about wood species and the importance of hitting a stud. Now pick an idea that matches your skill level and your room style.
Which one will you try first? Go grab that scrap two by six and cut a simple triangle this weekend. You might be surprised how easy it is to make something that looks way better than a shiny metal L bracket.